
Every time you upload a photo, WordPress creates five or ten different hidden size variations to fit your theme. These extra files consume your storage and slow your site backups.
Plus, most of these extra image sizes are never used on your site. They sit on your server like digital clutter and can even increase your monthly hosting costs.
I’ve found that using an automated image deletion tool is the best way to safely reclaim that space. This helps reduce your backup size significantly and keeps you within your hosting plan limits.
In this article, I will show you how to automatically scan for unused image sizes and safely bulk-delete them to keep your website lean and your backups running smoothly.
Quick Summary: WordPress creates multiple copies of every image you upload, which can quickly fill up your server storage and slow down backups. This guide shows you how to use the WP Media Cleanup plugin to safely scan for and delete these unused image variations without breaking your website.
Here are the topics I’ll cover in this tutorial:
- Why Delete Unused Image Duplicates in WordPress?
- Step 1: Install and Scan for Unused Images
- Step 2: Review and Delete Unused Variations
- Step 3: Restoring Deleted Images (If Needed)
- Advanced Method: Automating Media Cleanup with WP-CLI
- Bonus Tip for Optimizing Your Remaining Media Files
- Frequently Asked Questions About Image Optimization in WordPress
- Additional Resources for Keeping Your Site Optimized
Why Delete Unused Image Duplicates in WordPress?
Every time you upload a photo, WordPress creates five or ten different variations to fit your theme. It does this to make sure your images look crisp on mobile phones and fit perfectly into blog post thumbnail grids without slowing down the page.
However, this is also why your media library can quickly become cluttered and take up so much server space.
For example, if you upload a 2 MB original file, WordPress creates 5 variations at 500 KB each. This means a single upload is taking up 4.5 MB of total storage.
While these extra image sizes help your site look good on mobile phones, your theme might only use a few of them. The rest just sit on your server and take up valuable space.
Plus, many budget hosting providers have strict limits on how many files you can store. Deleting thousands of unused image variations helps you stay under these limits and avoids extra fees.
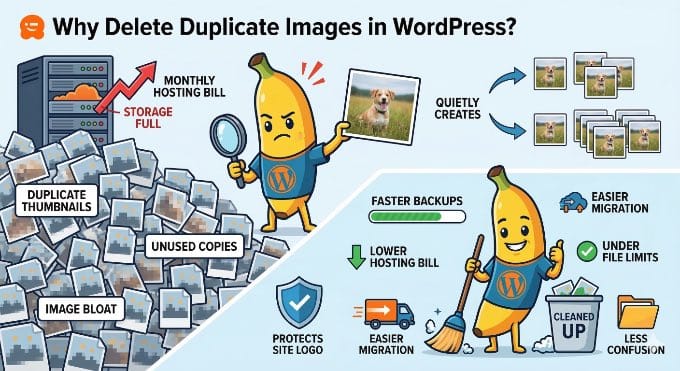
Cleaning up these unused variations is a great way to improve your website:
- Make your website backups much smaller and finish faster.
- Reduce your storage use, which can lower your hosting bill.
- Make it much faster to move your website to a new host or server.
- Keeps your site running smoothly by staying under your host’s file limits.
- Removes the confusion caused by multiple versions of the same file.
Step 1: Install and Scan for Unused Images
To follow this tutorial, you will need the WP Media Cleanup plugin. It is the best tool for safely reclaiming server space. It identifies and allows the removal of unused image variations while fully protecting your original source files.
I’ve also found that some users worry about accidentally deleting their site logo. The good news is that WP Media Cleanup is smart enough to see if an image is being used in your widgets or theme customizer settings. This prevents it from deleting important images like your site logo.
This means it only targets the hidden thumbnails that nobody is looking at. It protects your important files while clearing out the extra files you don’t need.
Before You Begin: I highly recommend making a complete backup of your site before doing any bulk deletion. While WP Media Cleanup is a highly reliable tool, a full backup is a smart best practice.
As a built-in safety net, the plugin temporarily saves your deleted variations for 30 days (which I will show you how to restore in Step 3). However, a full backup is still essential if you use a customized theme.
The first thing you need to do is install and activate the WP Media Cleanup plugin. If you need help, you can see our guide on how to install a WordPress plugin.
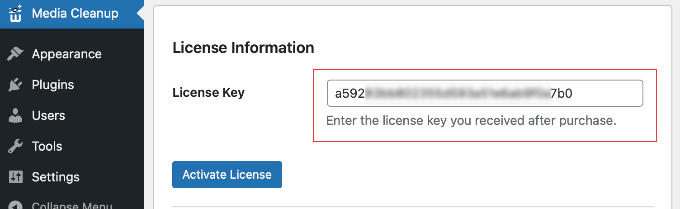
Once the plugin is active, head over to the Media Cleanup page from your WordPress admin sidebar.
Here, you will need to enter your license key and then click the ‘Activate License’ button. You can find this in your account area on the WP Media Cleanup website.
Before you run your first scan, it is a good idea to clear your WordPress cache. This makes sure the plugin sees the most recent version of your content and doesn’t miss any images that are live on your site.
Then, start by navigating to the Media Cleanup » Cleanup page and clicking the ‘Scan for Unused Variations’ button. The plugin will look through your entire media library to find images that are not being used on your posts or pages.

Wait for the progress bar to finish its work. Depending on how many photos you have uploaded over the years, this might take a few minutes to complete.
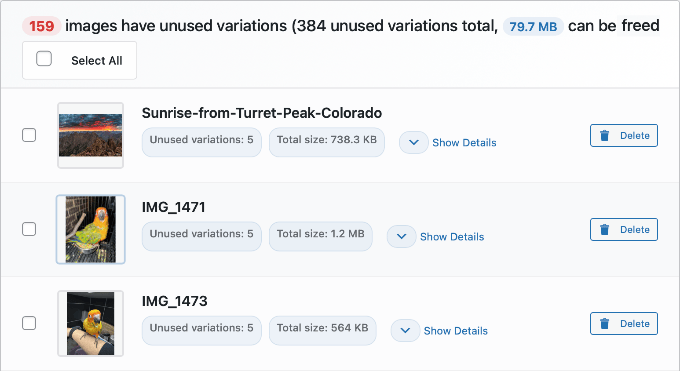
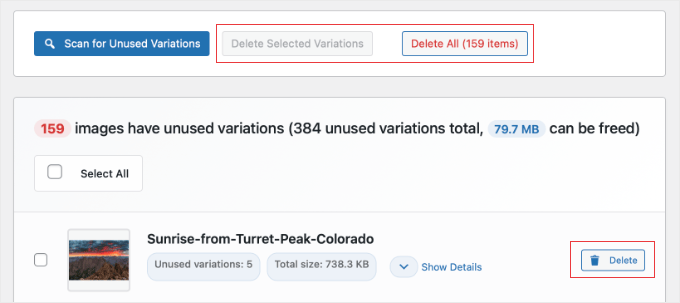
Once the scan is complete, the plugin will display a list of all the images that have unused variations. For each item, you will see a small image preview, the file name, and the total number of unused variations. You will also see how much space they take up.
If you want to see exactly which sizes are targeted (like ‘medium’, ‘large’, or ‘1536×1536’), you can simply click the ‘Show Details’ dropdown.
Step 2: Review and Delete Unused Variations
When you are ready to clean up your server, you have a few flexible options:
- Delete All: Click this button at the top to remove every unused variation found in the scan and get the biggest boost in server space.
- Delete Selected Variations: Use the checkboxes to select specific images, then click this button to only clean up those specific files.
- Individual Delete: Click the ‘Delete’ button next to a single image to remove variations just for that file.
Don’t worry about your original photos during this step. WP Media Cleanup only targets the size variations (like ‘-150×150.jpg’) and keeps your source files safe and untouched.
Whenever you choose to delete files, a confirmation dialog will appear. You must confirm the action before proceeding, making sure you have full control over your media library.
Step 3: Restoring Deleted Images (If Needed)
Even though the cleanup process is highly accurate, the plugin includes a built-in safety net.
Whenever you delete variations, the deleted files are automatically backed up by the plugin for 30 days before permanent removal. If you browse your website after a cleanup and notice a broken layout, you don’t need to panic.
Because the list of deleted files can be very long, finding the exact image you need to restore might seem tricky. Luckily, there is an easy trick to find it.
First, simply right-click on the broken image icon on your live website and select ‘Copy Image Address’ (or ‘Copy image link’, depending on your browser).
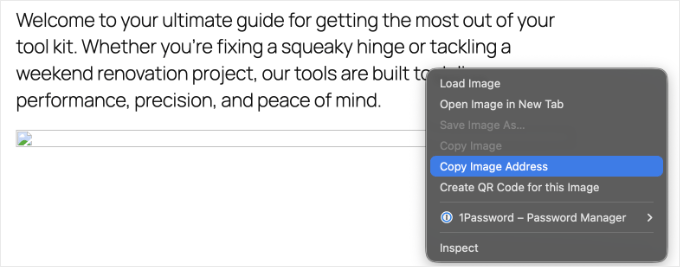
Next, paste that link somewhere you can read it, like a blank note or document.
You don’t need the full web address. You just need to copy the very last part of the link, which is the file name (for example, my-header-image-150x150.jpg).
Then, head over to the plugin’s Restore page and paste that file name into the search box. This will instantly filter the long list so you can find the exact variation that went missing.
Once you find the file, simply select it and click the ‘Restore’ button. This allows you to confidently clean your media library and reduce disk usage without any permanent risk.

Pro Tip: The plugin permanently deletes these backups after 30 days. So, I highly recommend browsing your most important pages and posts soon after your cleanup to double-check that everything looks perfect.
If you change your WordPress theme later on, your new theme might require different image dimensions. If that happens, simply use a Regenerate Thumbnails plugin to automatically create the specific sizes your new theme needs.
Advanced Method: Automating Media Cleanup with WP-CLI
If you are a developer or manage many client sites, you might find it frustrating to click through the dashboard for every site.
WP Media Cleanup includes full WP-CLI support, which allows you to automate the scanning and deletion process across multiple websites quickly.
If your WordPress hosting provider gives you SSH access, you can use the command line to scan your library and delete unused variations without opening a browser. You can usually find your SSH details inside your hosting cPanel or account dashboard.
Expert Tip: Most budget shared hosting plans do not include SSH or WP-CLI access. If you can’t find these settings in your hosting dashboard, you will likely need to upgrade to a VPS or a managed WordPress host.
First, you should run a scan to see which files are safe to remove:
# Find and review unused variations
wp media-cleanup find_unused --format=table
In my experience, using the --format=table flag is the best way to see a clear list of filenames and sizes.
Once you have reviewed the list, you can delete the variations with a single command.
# Delete them with confirmation
wp media-cleanup delete_unused --yes
I recommend running the stats command after your cleanup.
This shows you exactly how much disk space you saved across your entire server, which is a great report to show your clients.
# Check storage statistics
wp media-cleanup stats
Using the command line is the fastest way to keep a large network of sites lean and fast. It takes the guesswork out of maintenance. This makes sure your server stays clutter-free with just a few keystrokes.
Bonus Tip for Optimizing Your Remaining Media Files
Once you have deleted the extra image sizes, you should optimize the original photos that are still on your site. Many high-quality images are much larger than they need to be for a fast site.
By doing the cleanup step first, you are saving server resources and plugin credits, because you are only compressing the files you plan to keep.
I recommend using an image compression plugin to shrink your file sizes without losing quality. This makes sure your pages load quickly for your visitors. It also keeps your server storage low.
Frequently Asked Questions About Image Optimization in WordPress
I get many questions from our readers about how to keep their WordPress media libraries clean. Here are the answers to the most common questions.
Is it safe to delete unused media files in WordPress?
Yes, it is highly safe when using a dedicated tool. The WP Media Cleanup plugin is designed to protect your original photos. It only targets the hidden, auto-generated size variations. Just keep in mind that it will not delete photos you uploaded twice by mistake.
As a built-in safety net, the plugin temporarily saves your deleted variations for 30 days, so you can easily restore them if a layout looks broken.
However, I always recommend making a complete backup of your site before you start. This makes sure you can quickly restore your site. This is important if your theme uses custom-coded images that the scanner couldn’t read.
How does WordPress create so many extra image files?
When you upload an image, WordPress automatically creates several variations in different sizes, like thumbnail, medium, and large. Your WordPress theme and certain plugins can also create their own specific image sizes.
This adds to the total number of files stored on your server for every single upload. Over time, these extra sizes can take up more space than the original photos themselves.
How often should I clean my WordPress media library?
The frequency depends on how often you add new posts and images to your site. For a busy blog or online store, I recommend performing a cleanup every 3 to 6 months.
For smaller websites, an annual cleanup is usually enough to keep things organized. Regular maintenance makes sure your backups stay small and your hosting costs stay low.
Additional Resources for Keeping Your Site Optimized
I hope this article helped you learn how to find and delete unused image variations in WordPress automatically.
Now that you have cleaned up your media library, you might want to learn more about managing your images:
- How to Optimize Images for Web Performance
- Best WordPress Image Compression Plugins Compared
- The Ultimate Guide to Boost WordPress Speed
- Best WordPress Backup Plugins Compared
If you liked this article, then please subscribe to our YouTube Channel for WordPress video tutorials. You can also find us on Twitter and Facebook.
The post How to Find and Delete Duplicate Images in WordPress Automatically first appeared on WPBeginner.
from WPBeginner https://ift.tt/TG2UE7n


0 Comments